原文地址:https://lefred.be/content/extending-mysql-using-the-component-infrastructure-part-2-building-the-server/
作者:lefred
发布时间:2022年1月6日
这是 运用基础组件扩展mysql 系列文章的第二篇:
- extending mysql using the component infrastructure – part 1
- extending mysql using the component infrastructure – part 2: building the server
- extending mysql using the component infrastructure – part 3: component services
- extending mysql using the component infrastructure – part 4: error logging
- extending mysql using the component infrastructure – part 5: privileges
- extending mysql using the component infrastructure – part 6: functions
- extending mysql using the component infrastructure – part 7: messages to users
在该系列的第一篇文章中,描述了我们新组件的核心思想。
现在我们需要配置开发环境并从头开始编译服务器。
下载源码
如第一篇文章所说,有多种方式可以获取mysql源码,我这里从github的存储库取。然后你需要安装git:
$ git clone https://github.com/mysql/mysql-server.git
然后你需要准备安装目录
$ cd mysql-server
$ mkdir bin-debug
在编译mysql服务器之前,你需要先安装一些依赖包,例如 cmake,一个编译器,linux上的make和curses开发包,bison……
安装mysql
$ cd bin-debug
$ cmake .. -ddownload_boost=1 -dwith_boost=../downloads
我们指定所需boost版本的下载
$ make -j 4
-j 4 使用4个编译线程,你可以根据系统进行调整
所有内容编译完成后,你可以运行和测试新的已编译服务器。
测试
最简单的测试方式,就是使用mtr:
$ cd mysql-test
$ perl mtr --mem --start
...
worker[1] using config include/default_my.cnf
worker[1] port and socket path for server(s):
worker[1] mysqld.1  13000  /home/fred/workspace/mysql-server/bin-debug/mysql-test/var/tmp/mysqld.1.sock
worker[1] waiting for server(s) to exit...
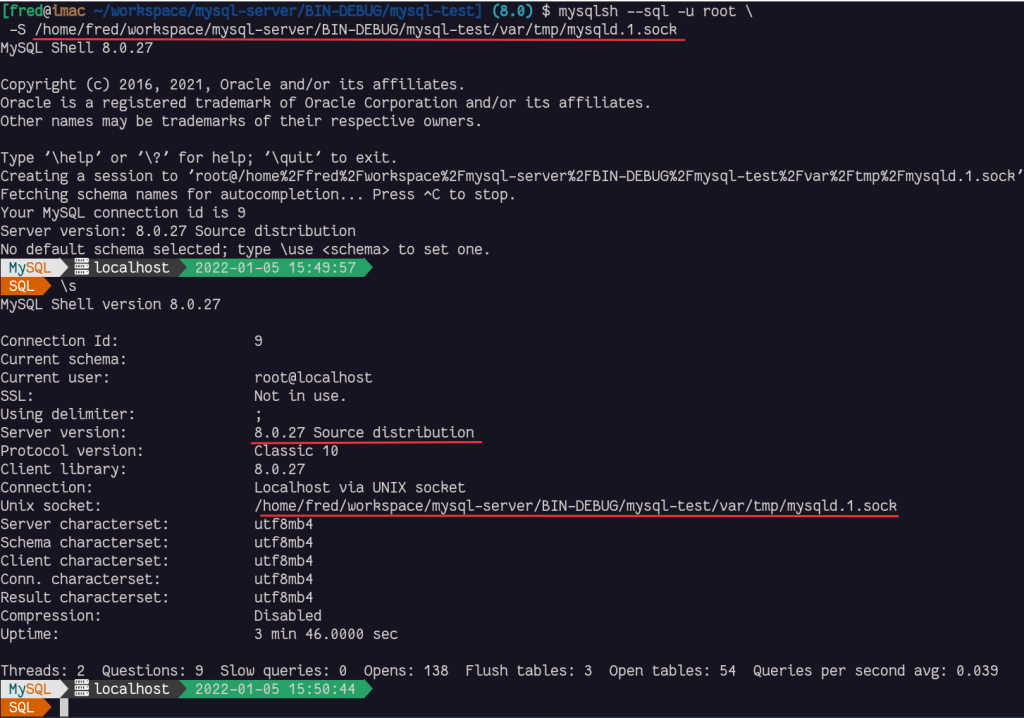
我们可以用mysql shell和socket文件连接到新编译的mysql服务器:
$ mysqlsh --sql -u root \
 -s /home/fred/workspace/mysql-server/bin-debug/mysql-test/var/tmp/mysqld.1.sock
结论
现在我们可以从源码编译mysql并启动我们新建的服务器。这将是我们新组件的基础。
在下一篇文章,我们将设置检查需要哪些组件服务,并创建我们组件的框架。
关注我
关注@lefred
通过电子邮件订阅博客
请输入您的电子邮件地址以订阅本博客,并通过电子邮件接收新文章的通知。
最后修改时间:2022-05-17 21:21:30
「喜欢这篇文章,您的关注和赞赏是给作者最好的鼓励」
关注作者
【米乐app官网下载的版权声明】本文为墨天轮用户原创内容,转载时必须标注文章的来源(墨天轮),文章链接,文章作者等基本信息,否则作者和墨天轮有权追究责任。如果您发现墨天轮中有涉嫌抄袭或者侵权的内容,欢迎发送邮件至:contact@modb.pro进行举报,并提供相关证据,一经查实,墨天轮将立刻删除相关内容。